ShapeShifter is now available to buy from Cronosoft: http://cronosoft.orgfree.com/ I
received my copy a few days ago and will be adding it to my growing collection.
If you want to try before you buy there is a playable demo here: http://1drv.ms/UIuGYo
Showing posts with label programming. Show all posts
Friday, 3 October 2014
Friday, 31 January 2014
Updating the tool for my games levels
I found some time to update the program that I will use to
design my game levels. I fixed a few small bugs and added some new features.
The status bar now shows the currently selected shape name and the total number
of shapes used. I have also added a print option that will print a giant map of
all the levels defined in a text file. I have expanded the raw data comment so
that the grid can be resized and redrawn if I need to edit a previous design.
Once all the levels have been added to a text file, it is loaded and the levels
spread out in a user defined grid pattern. This is then saved as a bitmap. As
far as I can tell, this application now does everything I need it to do. I’ll
start designing some easy levels to start with and then some more difficult
ones. Here is an image of the latest application.
Labels:
.net,
C#,
Game,
programming,
Tool,
Z80,
ZX Spectrum
Wednesday, 29 January 2014
Tooling for my new Spectrum game
My Spectrum game is coming along nicely but I have got to a point where I need to start adding levels. I needed a tool to help me create the standing data so I spent a few hours with Visual Studio writing an application in c#. Nothing over the top, just a couple of grid views and minimal code. It actually works rather well allowing me to build up a level and then creating the data statements ready to past straight into the TommyGun IDE. Here is a picture of the latest version of the tool. Having used it a bit I realised I need to add a couple of other features. I am also working on a separate class for the tool that will take all the level data and create one huge bitmap image of all the levels. I can now create some test levels and concentrate on writing the next chunk of Z80.
Saturday, 21 December 2013
Update on my new Spectrum game
Development of my new Spectrum game is going well. I am
developing the code in small manageable sections and so far I’ve not had any
problems. The next thing to do is work on the collision detection followed by
some code to reposition dropped shapes. I am nearly in a position where I will
need to create an editor to design around 100 screens. I had hoped to get the
game out for Christmas but various things have got in the way so it should be
ready in the first quarter of 2014. For now, here is a screen shot of the game.
Can you tell what type of game it’ll be? The area to the left and bottom of the
screen will contain the score and other in-game info. I’m looking for some help
in this area. If you are interested in designing some Spectrum graphics then
let me know.
Thursday, 9 May 2013
Pascal version of Cavern Fighter on the Raspberry PI
After several hours making changes to my original Delphi code,
I have now recompiled my Cavern Fighter PC game to run on the Raspberry PI.
Using Free Pascal and the Lazarus IDE I finally got it running. At the moment
the frame rate is a little slow and it has no sound. I’ll either get the Linux
files for Bass or look to use the SDL library to play the background tunes and
spot effects. For those who don’t know, I wrote this game back in 2004
for a Retro Game competition. It is based on a ZX Spectrum game of the same
name.
Here is a picture of it running in the debugger via a VNC
link.
Here is a picture of the original Spectrum version.
Monday, 28 January 2013
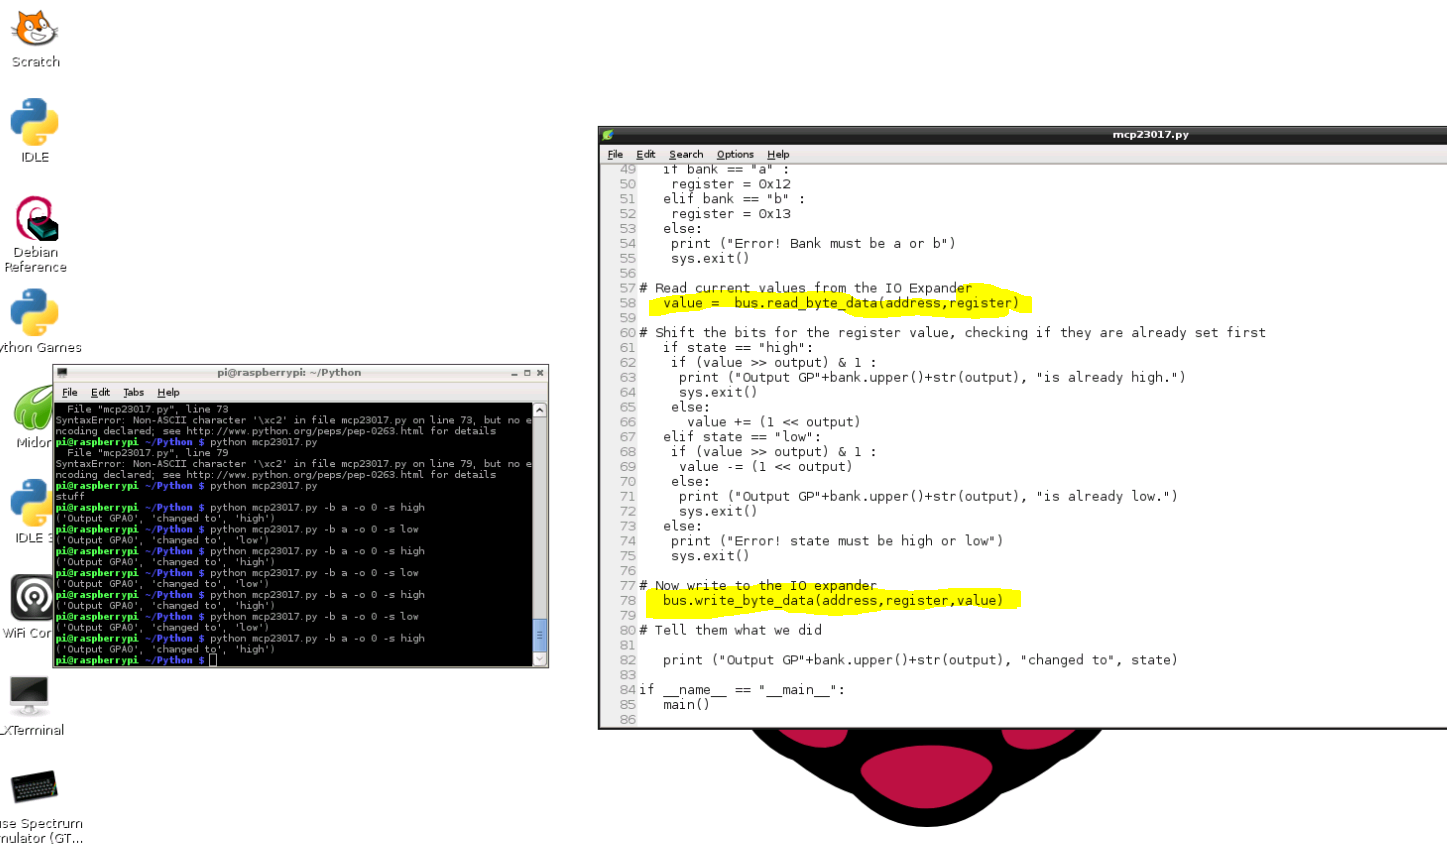
Controlling an LED from a Raspberry Pi
Whilst fleshing out ideas for my new ZX Spectrum game, I’ve
also found some time to work with my Raspberry Pi. A while ago I bought a
breakout board kit for the Pi. This was easily constructed so I needed to then
test it. The board connects via the i2c bus and exposes several ports that can
be used as inputs or outputs. The controller chip only costs about a £1 so if
things went wrong it is a lot cheaper to buy a new chip than it is a new Pi. By
default the Pi has the i2c support turned off. This can be enabled by
commenting out the i2c line in the blacklist file. A few supporting files need
to be download and then it’s ready to work. I adapted some Python code and
wired up a LED and resistor to my breadboard. I could then switch the LED on
and off from the command line. This isn’t exactly rocket science but it proves
that everything is installed correctly and I that can still solder properly.
The next step is to look at controlling my amateur radio kit remotely. Here are
some pictures of the board and a screen shot of the Python program. I am still
using VNC to connect to the Pi so I can program from the comfort of my lounge.
Subscribe to:
Posts (Atom)